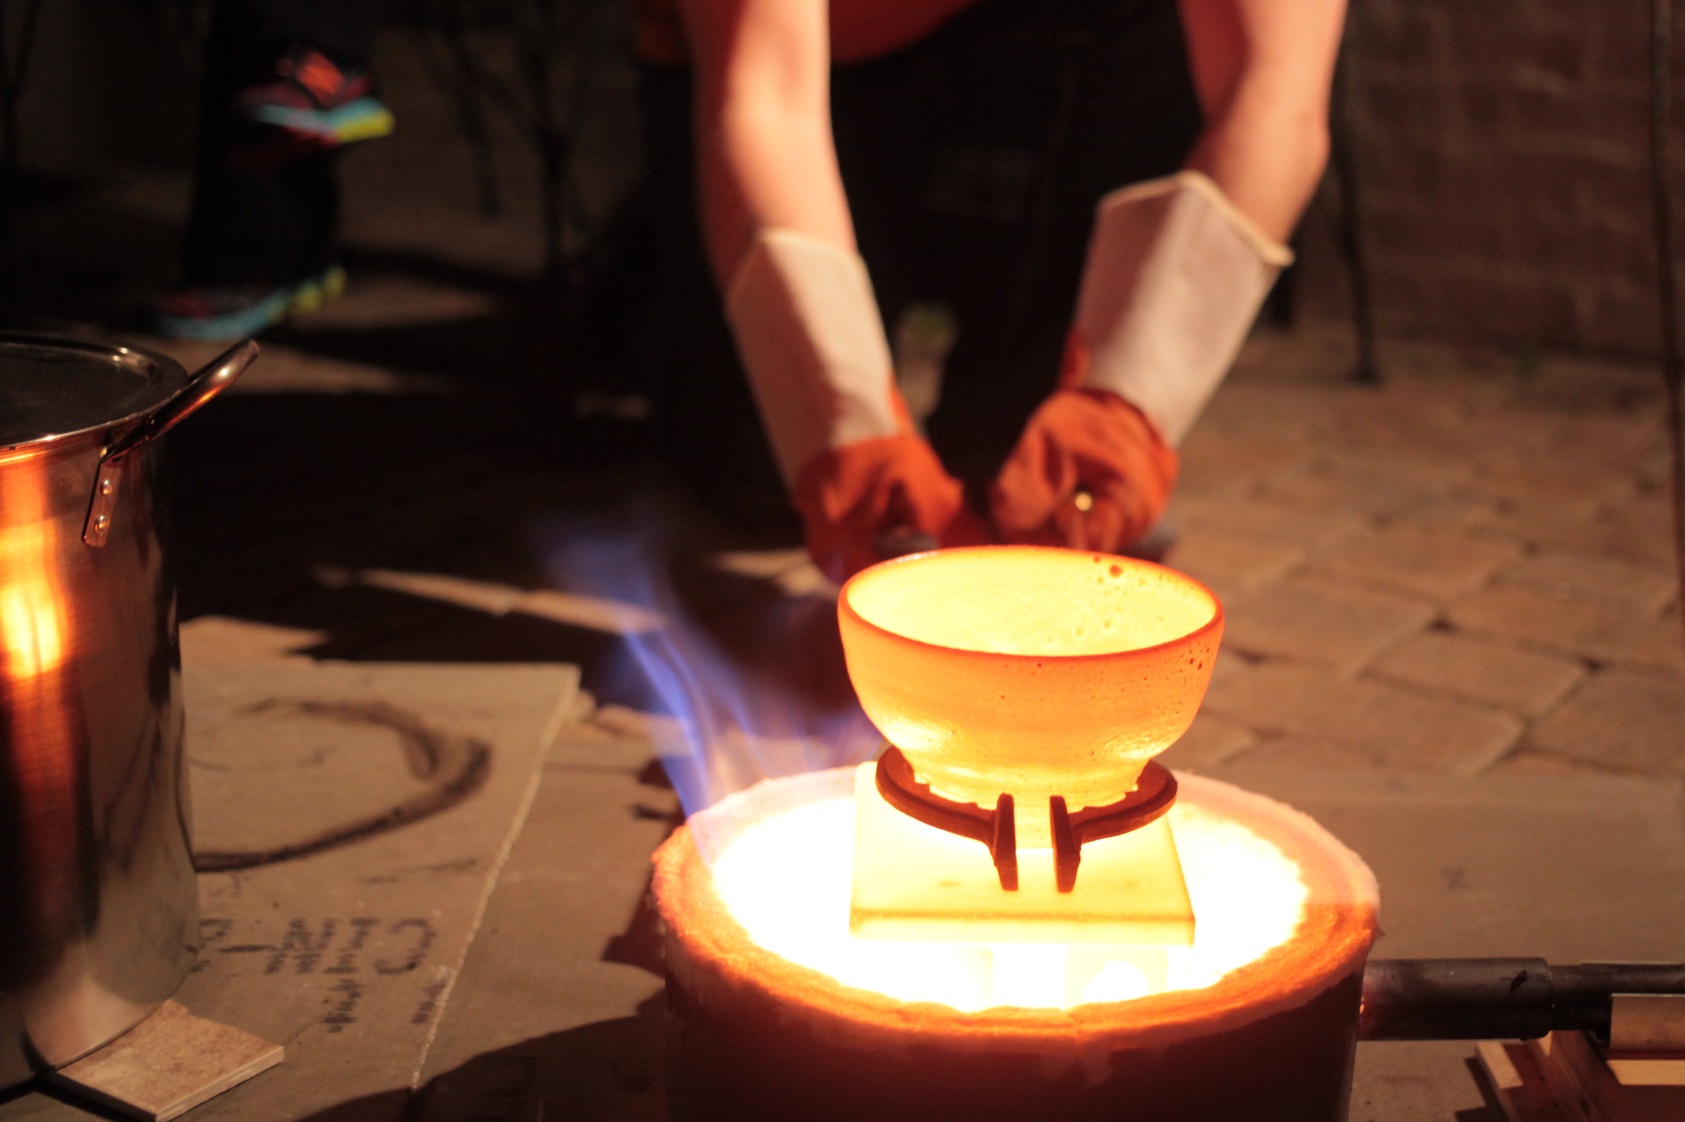
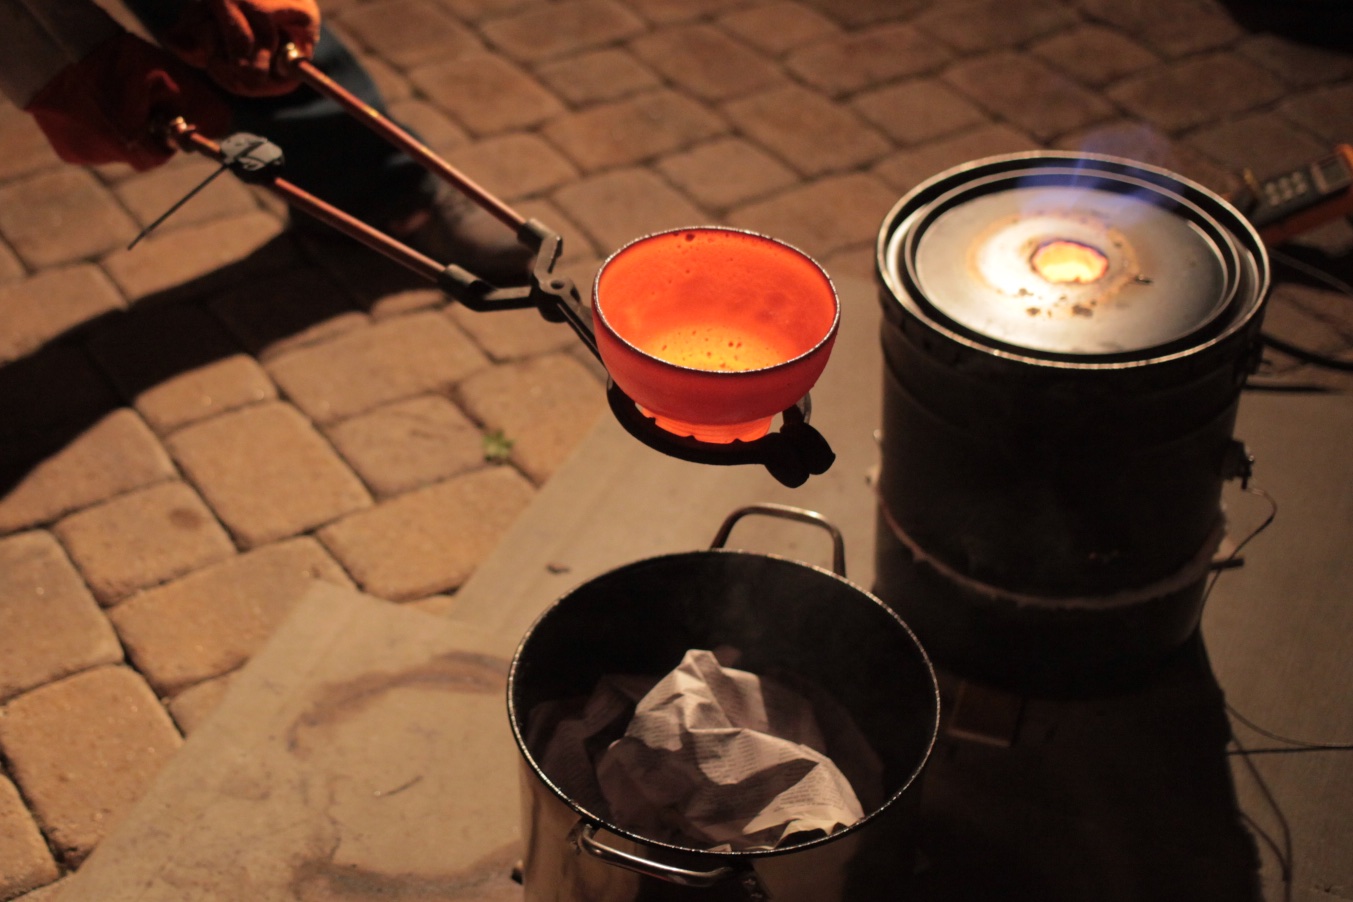
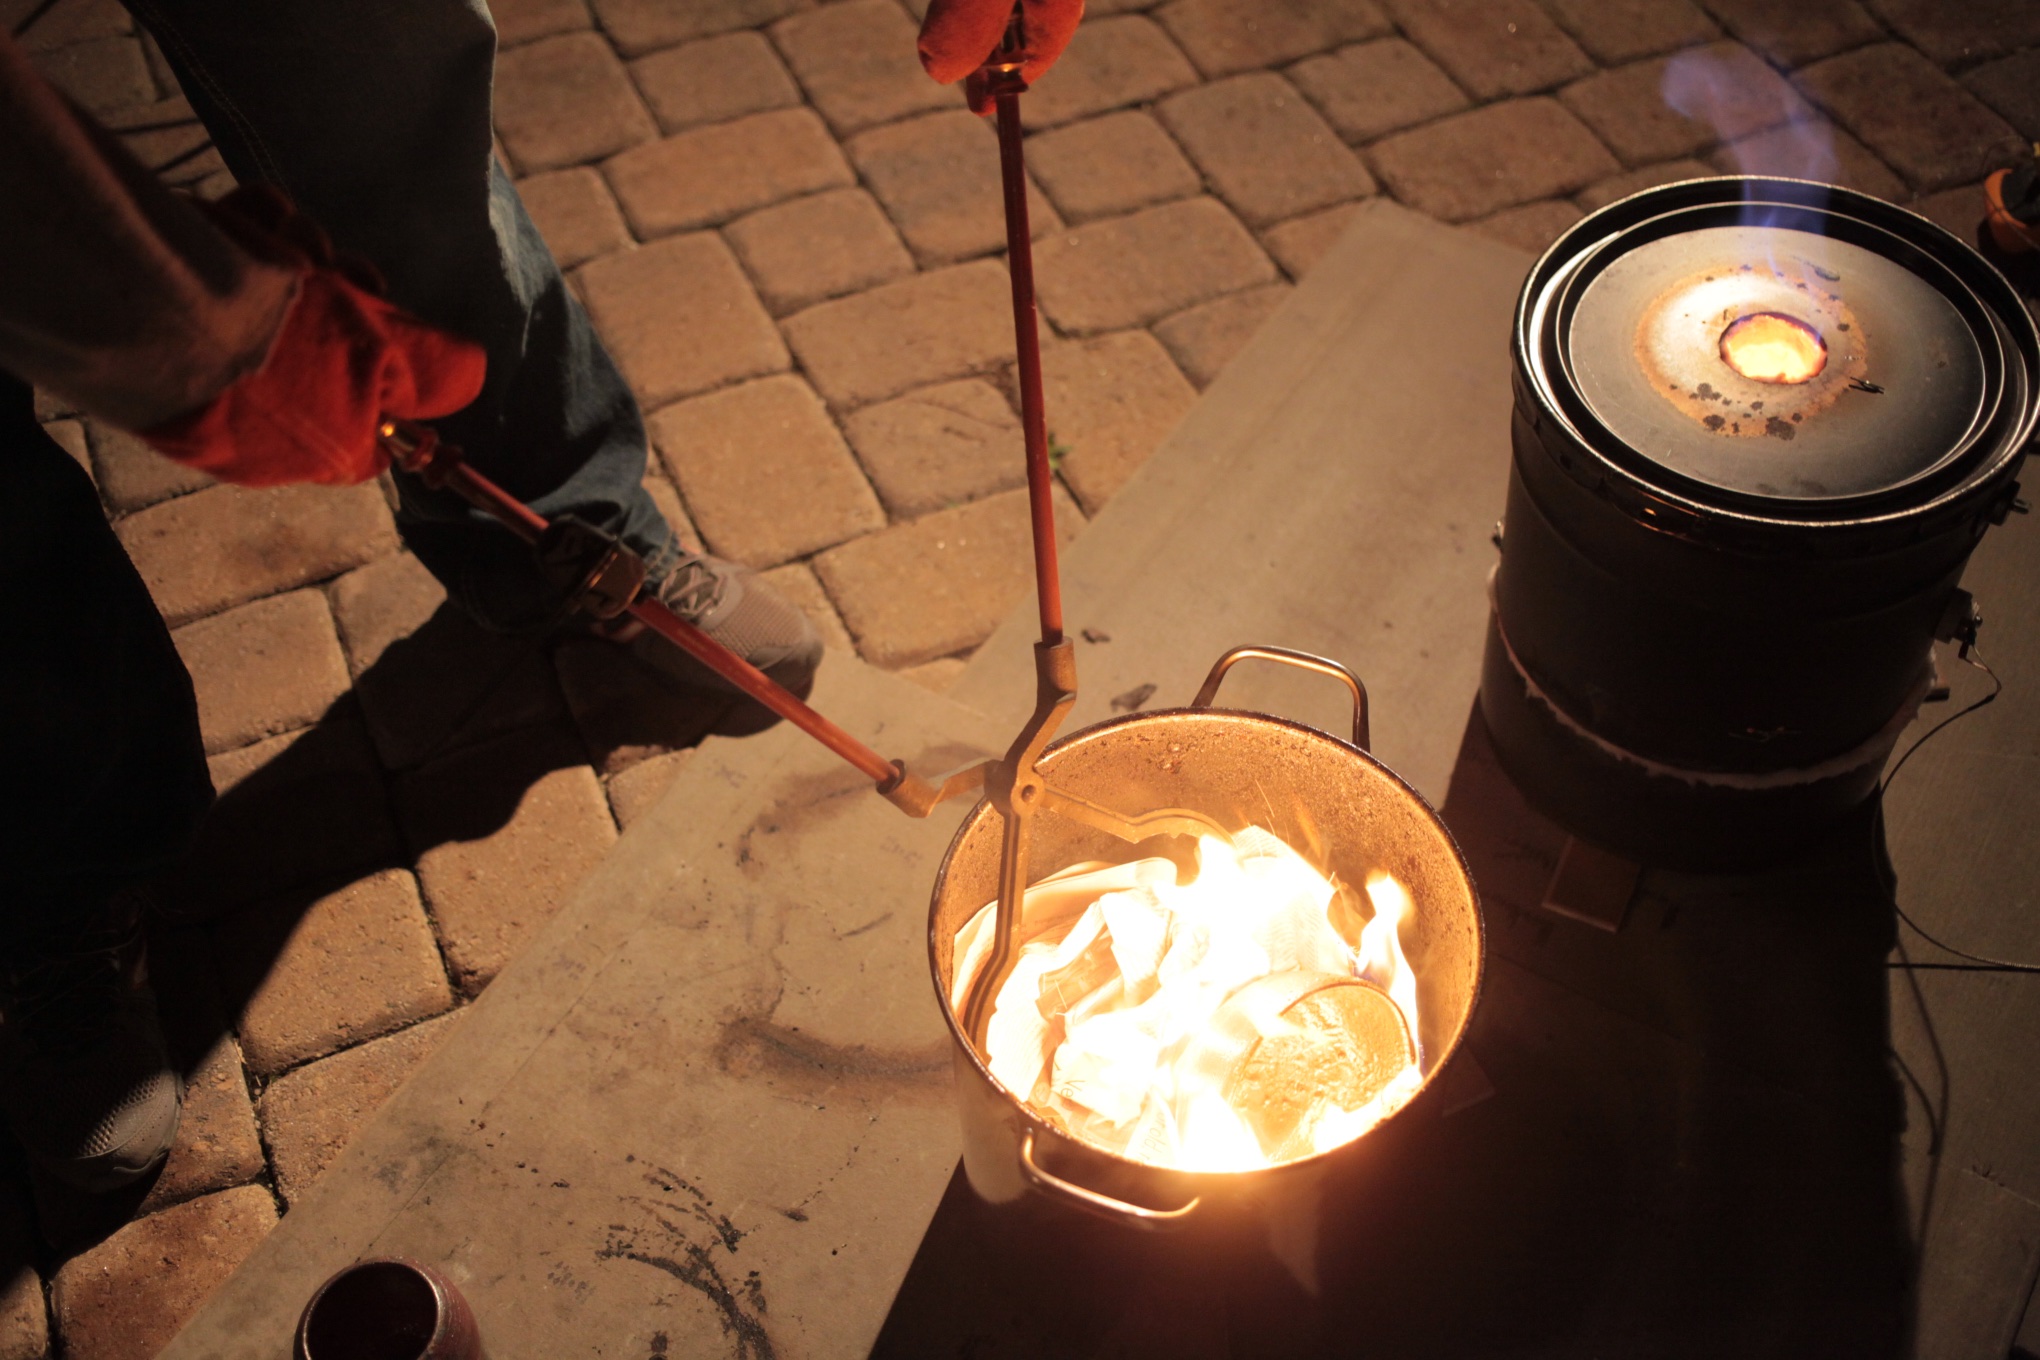
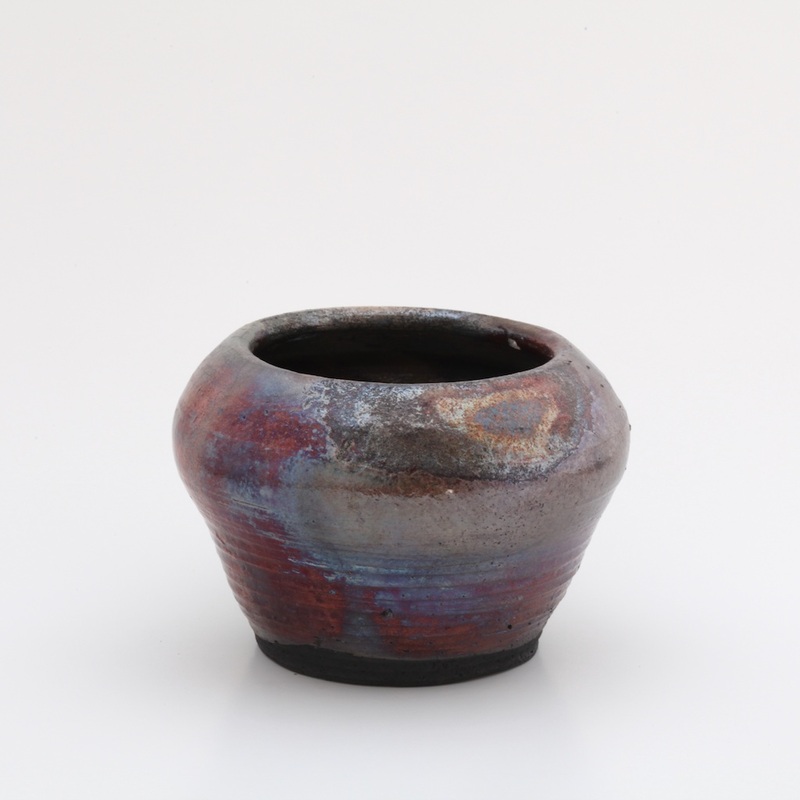
Raku Kiln
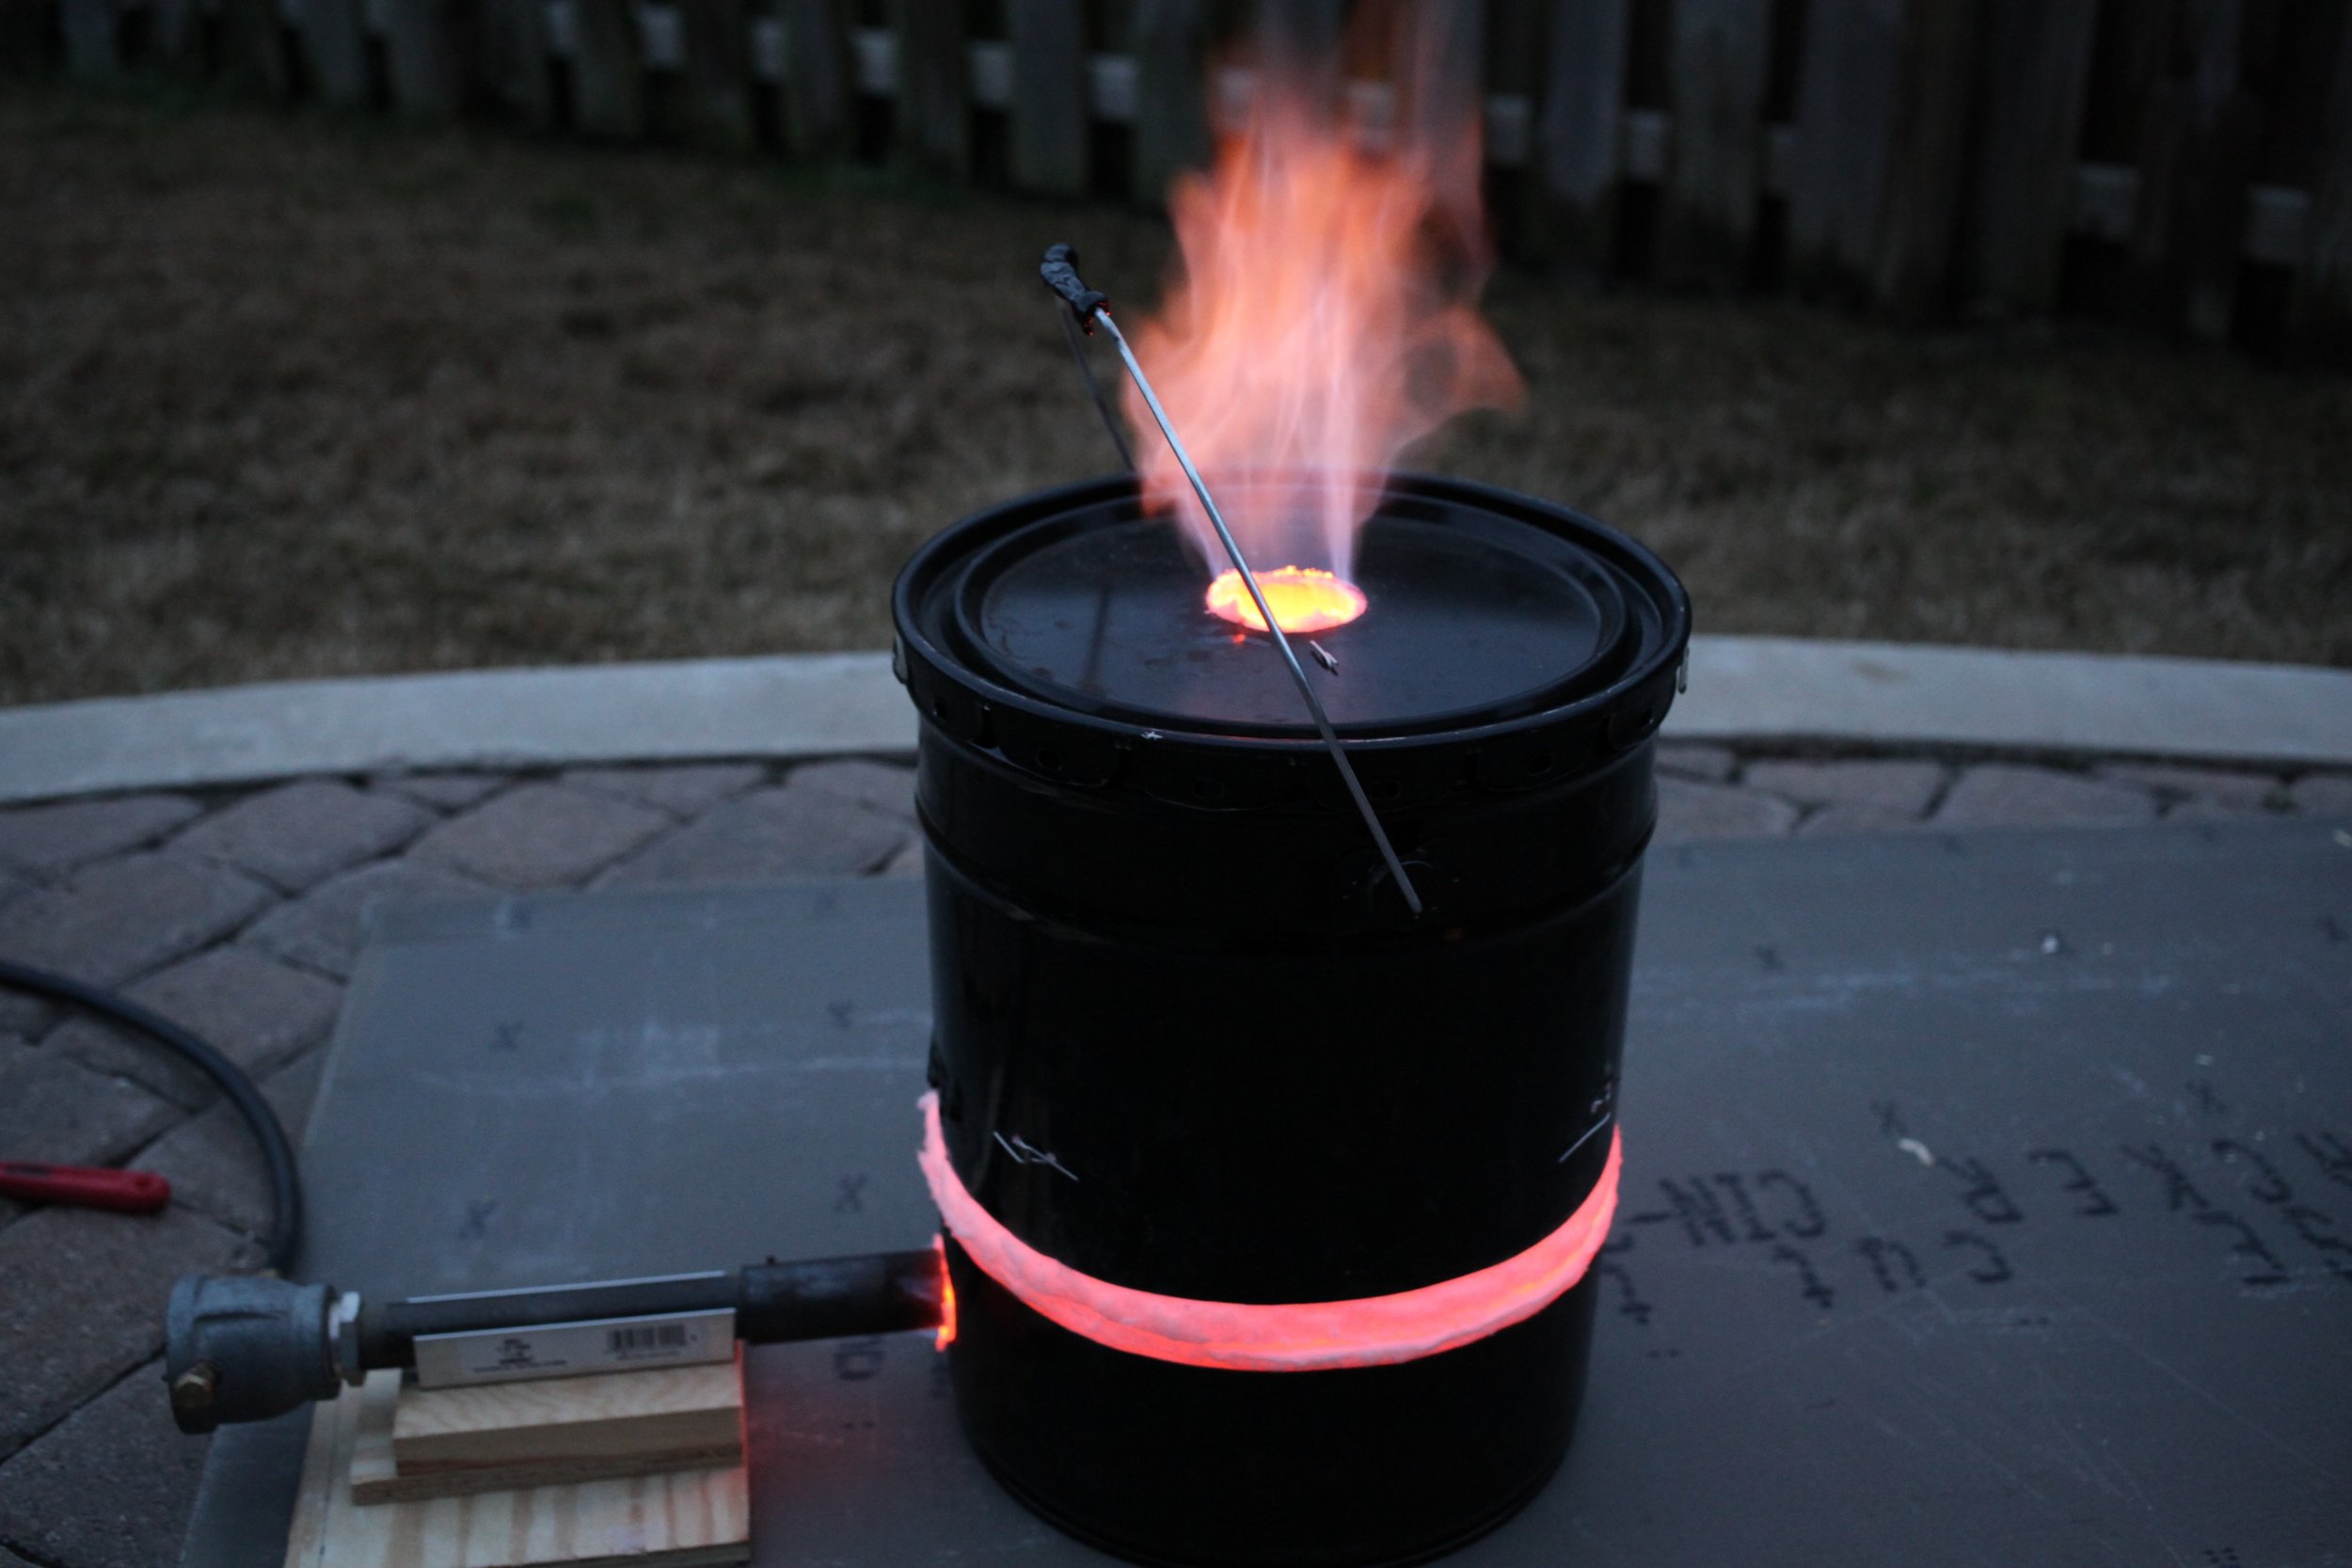
Here is a project with a similar design: http://hackaday.com/2016/10/01/portable-lightweight-foundry/. If we built this again, we would use a stainless container instead of the regular steel bucket, as it has started rusting due to the heat.
![5-gallon steel bucket ( BayTec ) and ceramic fiber blanket ( Axner ).](https://images.squarespace-cdn.com/content/v1/594e9d9fb3db2b9cbb240885/1503780936046-A2KMF7RBG5AIPFN1NTPY/IMG_0853.jpg)
![Cut circles to fit in the top and bottom of the bucket.](https://images.squarespace-cdn.com/content/v1/594e9d9fb3db2b9cbb240885/1503780937934-QID0A6NPCYGC6N0RJ4WC/IMG_0855.jpg)
Cut circles to fit in the top and bottom of the bucket.
![Cut the bucket ~6" from the bottom.](https://images.squarespace-cdn.com/content/v1/594e9d9fb3db2b9cbb240885/1503780943305-NGI1CU4S3FAUHJ03RVSG/IMG_0864.jpg)
Cut the bucket ~6" from the bottom.
![IMG_0865.jpg](https://images.squarespace-cdn.com/content/v1/594e9d9fb3db2b9cbb240885/1503780944784-TK3IWJI6OWXSKI2D23G1/IMG_0865.jpg)
![Put the lid on and measure for a hole in the top.](https://images.squarespace-cdn.com/content/v1/594e9d9fb3db2b9cbb240885/1503780949659-1O1ZZVCSJZGOWLORWPHK/IMG_0868.jpg)
Put the lid on and measure for a hole in the top.
![Cut an exhaust hole in the top. ](https://images.squarespace-cdn.com/content/v1/594e9d9fb3db2b9cbb240885/1503780951268-F1R1Y3O252F75UQCMBPO/IMG_0869.jpg)
Cut an exhaust hole in the top.
![Cut a burner hole in the side of the bottom. ](https://images.squarespace-cdn.com/content/v1/594e9d9fb3db2b9cbb240885/1503780955123-5YUQB8JYRP12ZWWMQDYL/IMG_0871.jpg)
Cut a burner hole in the side of the bottom.
![Fit the ceramic blanket into the top and bottom.](https://images.squarespace-cdn.com/content/v1/594e9d9fb3db2b9cbb240885/1503780957473-DLQSWS21ONK8UMJB8CIV/IMG_0874.jpg)
Fit the ceramic blanket into the top and bottom.
![Cut a matching hole in the ceramic blanket in the lid.](https://images.squarespace-cdn.com/content/v1/594e9d9fb3db2b9cbb240885/1503780960847-0EUBMMOPIRFCNV0M1XVB/IMG_0880.jpg)
Cut a matching hole in the ceramic blanket in the lid.
![Ceramic fiber buttons ( Axner ) and nichrome wire ( Axner ) ](https://images.squarespace-cdn.com/content/v1/594e9d9fb3db2b9cbb240885/1503780965146-3C0PX1TKMH0FHJT0OOL7/IMG_0884.jpg)
![Wire cut and bent to hold a button in place.](https://images.squarespace-cdn.com/content/v1/594e9d9fb3db2b9cbb240885/1503780966492-H0BZUIW80HDMU1FHAN4I/IMG_0885.jpg)
Wire cut and bent to hold a button in place.
![Measuring the sections of blanket to line the sides of the top and bottom.](https://images.squarespace-cdn.com/content/v1/594e9d9fb3db2b9cbb240885/1503780973450-2FU2AVB5VXI9YHOR9COR/IMG_0887.jpg)
Measuring the sections of blanket to line the sides of the top and bottom.
![IMG_0888.jpg](https://images.squarespace-cdn.com/content/v1/594e9d9fb3db2b9cbb240885/1503780973893-RI7JPQQV5D7QHM9DOBJS/IMG_0888.jpg)
![Holes drilled for the ceramic buttons in the top portion of the kiln.](https://images.squarespace-cdn.com/content/v1/594e9d9fb3db2b9cbb240885/1503780980171-XFRMVNW413QQ8GOHS1VZ/IMG_0891.jpg)
Holes drilled for the ceramic buttons in the top portion of the kiln.
![Ceramic buttons installed on the sides and lid.](https://images.squarespace-cdn.com/content/v1/594e9d9fb3db2b9cbb240885/1503780980756-H84VLJXO6JM9AUDXWRTN/IMG_0893.jpg)
Ceramic buttons installed on the sides and lid.
![Twisted nichrome wire holding the buttons in place.](https://images.squarespace-cdn.com/content/v1/594e9d9fb3db2b9cbb240885/1503780985465-FH5JDZMBEU96FQP9KMA5/IMG_0894.jpg)
Twisted nichrome wire holding the buttons in place.
![Various kiln shelves and posts ( Axner ). Ceramic buttons were not needed on the bottom.](https://images.squarespace-cdn.com/content/v1/594e9d9fb3db2b9cbb240885/1503780987950-MM3F9GZ9B097C8YC9CEM/IMG_0898.jpg)
Various kiln shelves and posts (Axner). Ceramic buttons were not needed on the bottom.
![A wood and metal jig to hold the burner. I would not recommend using any wood for this. ](https://images.squarespace-cdn.com/content/v1/594e9d9fb3db2b9cbb240885/1503780992996-OFUL5MH2ZWGPHFDTYCVT/IMG_0902.jpg)
A wood and metal jig to hold the burner. I would not recommend using any wood for this.
![Ron Reil's burner design: http://ronreil.abana.org/Forge1.shtml#Propane . We already had this from another project. It is a great design, and pretty inexpensive to build, but it is a decent amount of work. I would recommend looking at commerci](https://images.squarespace-cdn.com/content/v1/594e9d9fb3db2b9cbb240885/1503783211088-N31JY8F249LRWDMT6SYN/RonReilBurner.png)
Ron Reil's burner design: http://ronreil.abana.org/Forge1.shtml#Propane. We already had this from another project. It is a great design, and pretty inexpensive to build, but it is a decent amount of work. I would recommend looking at commercial burners. This Axner Raku Burner Kit looks pretty good.
![Safety first! Heavy welding gloves and safety glasses are a must, along with long pants/sleeves and closed-toed shoes. ](https://images.squarespace-cdn.com/content/v1/594e9d9fb3db2b9cbb240885/1503780995423-2N07ZE0EQ1ND1CZ1ZT9A/IMG_0916.jpg)
Safety first! Heavy welding gloves and safety glasses are a must, along with long pants/sleeves and closed-toed shoes.
![First successful test firing!](https://images.squarespace-cdn.com/content/v1/594e9d9fb3db2b9cbb240885/1503780999012-XXR70J3000KQYIXHS7GK/IMG_0925.jpg)
First successful test firing!
![Here is the full setup: Kiln, burner, and burner holder. Not shown is the propane tank and regulator. We set the kiln on top of some old tiles, and then a cement backer board ( Lowes ). We also added a thermocouple (similar to this ) and digital re](https://images.squarespace-cdn.com/content/v1/594e9d9fb3db2b9cbb240885/1503780931317-9440OHPJEIS40MUAC17L/IMAG1192.jpg)
Here is the full setup: Kiln, burner, and burner holder. Not shown is the propane tank and regulator. We set the kiln on top of some old tiles, and then a cement backer board (Lowes). We also added a thermocouple (similar to this) and digital reader (Amazon). We later replaced the galvanized bucket with a cheap stainless pot.
![Once a piece is at full temperature, carefully remove the lid (wearing heavy welding gloves), and have a second person lift the pot with tongs (we used old fireplace tongs from a thrift store). ](https://images.squarespace-cdn.com/content/v1/594e9d9fb3db2b9cbb240885/1503780998055-7J5LLLIZ5IIH9C095J0V/IMG_3511.jpg)
Once a piece is at full temperature, carefully remove the lid (wearing heavy welding gloves), and have a second person lift the pot with tongs (we used old fireplace tongs from a thrift store).
![Transfer the pot to the reduction chamber (we found a big, cheap stainless pot to be perfect) which should already be full of combustible material (newspaper, dry straw, sawdust, etc.).](https://images.squarespace-cdn.com/content/v1/594e9d9fb3db2b9cbb240885/1503781000421-TU11K5UMDTDE1BXU987M/IMG_3513+-+Version+2.jpg)
Transfer the pot to the reduction chamber (we found a big, cheap stainless pot to be perfect) which should already be full of combustible material (newspaper, dry straw, sawdust, etc.).
![The combustible material will catch fire, then quickly place the lid on the reduction chamber. Let it cool, and then carefully remove the pot (using tongs).](https://images.squarespace-cdn.com/content/v1/594e9d9fb3db2b9cbb240885/1503781002215-99N1V1RR1L26SW8JMZLE/IMG_3516.jpg)
The combustible material will catch fire, then quickly place the lid on the reduction chamber. Let it cool, and then carefully remove the pot (using tongs).
![Here's an example of a finished raku pot after cleaning. No two pots will ever look the same, and be prepared to have fun experimenting with the process!](https://images.squarespace-cdn.com/content/v1/594e9d9fb3db2b9cbb240885/1503786842977-J0EH93A3QCO1F3U1QGN3/raku_bowl.jpg)
Here's an example of a finished raku pot after cleaning. No two pots will ever look the same, and be prepared to have fun experimenting with the process!